Monday, April 20, 2020

Awesome Augmented Reality with EyeJack


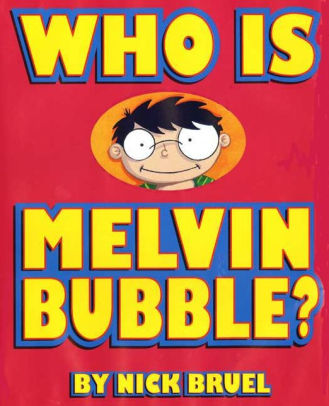
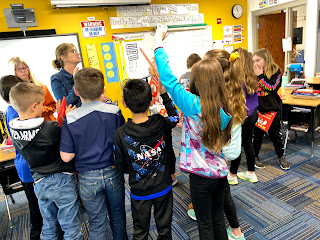
Shirley Rossman, 4th Grade Teacher at West Holt Elementary, leads her students in a creative autobiographical writing project each year. Based on the book "Who is Melvin Bubble?" by Nick Bruel, students engage in perspective writing, as each page describes themself through the eyes of a friend or family member. The final page is all about the student from the point of view of the student themself, and this is where we collaborated for an augmented reality twist to this project. 


  • Students wrote their drafts on paper and collected digital images of the family members and friends who were "telling the story."
  • I created a template file in Keynote that students could personalize with their content and eventually export as pdf for self-publishing/printing. 
  • Using the camera on an iPad, students took pictures of each of their handwritten final draft pages and added them to the appropriate placeholders in the Keynote template.
  • Each photo of the "narrator" of the page was opened in the Clips app, a cartoon filter was added, saved to camera roll, and then Airdropped to the students to add to their book file. 
  • We took photos of the students themself (one close up of their face for the cover and a full-body waving shot for the first and last pages) and used the Clips app to "cartoonize" and Airdrop as well. 
  • Using the free voice memos app each student recorded an audio narration of their final page of text (explaining who they are from their own point of view). 


Using Keynote again, students created an animation for their final page. The trigger image was their waving photo. It was added to a slide and then that slide was duplicated. Slide 1 will become your trigger image (export as png with transparent background) and Slide 2 is where you lock the image to the background and then create your animation around it. Then shapes, drawings, images, etc. were added, formatted, and then animated with motion paths and effects. Timings could be set to automatic, but students were encouraged to aim for about 30 seconds of total animation length (to match the maximum audio recording duration). When complete, the background image was unlocked and deleted, the slide background was set to transparent, and the 2nd slide was exported as a gif. 

I used the EyeJack Creator app (free download for Mac) to assemble each student's augmented reality experience for their final page. 
  1. Add trigger image (exported png from 1st Keynote slide)
  2. Upload animated gif (exported from 2nd Keynote slide)
  3. Add audio (mp3 from Voice Memos)
The EyeJack Creator app generates a QR code which is also saved and placed on the page in each students' Keynote "book."

Now, when people read their book, they use the free EyeJack app on their phone to scan that QR code and then hover over the trigger image on the page to see the animated come to life in AR. 

Each student's finished Keynote book was exported as a pdf. 
I used the softcover Tradebook option (Economy, color) on blurb.com to order a printed copy for each student and their family. (Approximately $5 each when all was said and done.)


In addition, for fun, I made a version for Mrs. Rossman and myself that had just the final page from every student's book into a class compilation of Augmented Reality student "About Me" animations. 


Tuesday, April 14, 2020

March 17th We Knew Everything Would Be All Right: a coronavirus collaboration book project

Every year on 9/11 Mrs. Beth Laible, 2nd grade teacher at West Holt Elementary in Atkinson, Nebraska, reads to her students a was inspired by a story called “September 12th We Knew Everything Would Be All Right.” It was authored and illustrated by a first grade class from an elementary school in Missouri.


Inspired, she wrote "March 17th We Knew Everything Would Be All Right" for her second grade class during the 2020 Coronavirus pandemic and subsequent school closures. She read her version aloud to her students in one of her Facebook posts during their first week of remote learning. Then she asked her students to collaborate with her to help illustrate the pages. Her students created the illustrations for the story during their remote learning experiences at home and sent back with their weekly work to Mrs. Laible. 

Beth reached out to Katie Morrow from ESU 8 for help in printing copies of the book to give to her students as a keepsake from their 2nd grade year, cut short by the pandemic. 

In addition to printing on blurb.com, Katie created a digital version of their book. Using Keynote and iBooks Author, she enhanced the pages with digital animations to bring the story to life. Mrs. Laible recorded the audio narration in Voice Memos on her iPhone and sent to Katie to add to the pages. The digital version of the book is now published on Apple Books

Now, anyone with an iPhone, iPad or Mac and an Apple ID can download for free and read this beautiful story for themselves!

http://books.apple.com/us/book/id1507696114
*Note: The book is best viewed in Apple Books on iPad in portrait orientation. Tap the first page thumbnail and then swipe to each subsequent page for the media to auto-play. Enjoy this story and important message!


If not able to view on an Apple device, you can watch a screen recording of the book on my iPhone here:

Wednesday, April 1, 2020

Teaching Remotely with Google Apps and Chromebooks

Resources to accompany my ESU 8 Zoominar on April 1, 2020

_________________________________________

**Teach From Home with Google (General Hub)

Google Classroom 

Screencastify 


YouTube

Google Meet

Going Paperless

  • Create PDF: Ctrl-P > Change Print Destination > Save as PDF
  • PDF Annotate - Kami from Catlin Tucker

Best Practices

  • Keep it short.
  • Keep it simple. 
  • Make it personal. 
  • Don’t try to perfect. 

Additional questions and expertise:


Tuesday, March 31, 2020

Personalized Professional Learning with the Apple Teacher Learning Center

See how to use the Apple Teacher Learning Center for personalized professional learning any time, any place.


Clips app for Remote Learning Videos

Apple's free Clips app is an incredible option for recording instructional content during distance & remote learning... both for teachers and for students!

1. Download (or make sure you have the most updated version of) the Clips app from the App Store. (Note: You may have to update your iPhone or iPad to be able to install it.)

2. Learn a little about what Clips can do for you.


3. Open the Clips app and make your first video!

4. Share as you normally would with your students and/or colleagues.


Related blog posts referencing Clips: https://esu8tech.blogspot.com/search/label/Clips

Tuesday, March 24, 2020

Monday, March 23, 2020

Continuous Learning via Zoom

Best 'Getting Started' video for Teachers


Another 'Teacher Tutorial with Zoom' option... this one created by a kid


How to Setup Zoom for Parents and Students


Zoom Directions for Students

(Customizable Google Slides/PDF handouts to send to students from The Techie Teacher)
https://www.thetechieteacher.net/2020/03/i-just-wanted-to-pass-along-some.html 

Zoom Task Cards

For more in-depth practice/training with Zoom. Shared graciously by Jenna Reeh of Papillion LaVista Schools. 
https://docs.google.com/presentation/d/1NJT-iYcl8um6qzE1h8yJgA-dCNld_nt0u7xDyExhFBA/preview?slide=id.g63a8e66b27_0_86

Tips for Many Users Today

  • UPON ENTRY in a Zoom meeting: Show people how to mute and unmute themselves. As meeting host, you can Manage Participants and Mute All, but allow for others to unmute and show them how to do so, so that future interactivity is seamless. In the Advanced Settings online you can also check a box so that all participants are automatically muted upon entry. Because this is a user-controlled setting and not a default, teach your participants how to do it themselves so they get comfortable using anyone's Zoom rooms. 
  • ZOOM FROM HOME: Because our home internet connectivity isn't as good as at school, consider turning off your video and/or telling participants to do the same. It is far more stable when just sharing audio. However, turn your video on from time to time to add that human connection when at all possible. 
  • RECORDING ZOOM SESSIONS: If you Record a Zoom meeting and you are looking for where that recording went, the default is a folder in your Documents called Zoom. You can control where the Recordings go in your Pro account by going to Zoom.us > Preferences > Recordings. You can also have them saved automatically to the cloud (then you don’t have to upload) and a whole bunch more advanced settings when you go to your Advanced Settings online in your Zoom account. 

Sunday, March 22, 2020

Students sharing iMovie videos from home.

Question: My students created a iMovie for class on their Macs. I’ve had a couple of students ask how to get the movie sent to me. Any ideas?

Suggested Solution:

When they are finished in iMovie they should export their project as a file:
File > Share > File. 

Because of slow upload speeds on home wifi, I would tell them to choose the smallest file size available (or at least Medium quality 720 p):
PastedGraphic-3.png

Then they will choose where the file saves and name it. 

Once finished, (this will take awhile), go to where the file was shared and upload to YouTube. Every student already has a YouTube channel with their school Google account. They just need to sign into YouTube with their school email and then add/upload their video.
 PastedGraphic-4.png

I think the rest will be pretty straightforward, but they will need to Publish it either as Public or Unlisted so that you can see it, 
When YouTube is finished processing it, then just Share the URL of the finished video with you (via Google Classroom, most likely).

This is by far the easiest route, but if there are any issues with it I could recommend a different path. 

Thursday, March 19, 2020

Getting Started with Canvas

If teaching remotely or simply wanting to learn how to use Canvas for when students return to our buildings, here are my recommended sources of professional learning.

Canvas Tutorial Video Series
(Watch the ones labeled 'Instructor' or 'All Users')

Canvas Fast Track Video Series
(This YouTube playlist features videos that are short and sweet.)


Recording with Quicktime

Teachers with Macs already have access to a simple recording studio on their laptop-- it is Quicktime Player.


  1. Simply launch Quicktime (or search for it with your Spotlight).
  2. Note that Quicktime now displays as the active application at the top of your screen. 
  3. Click on File >  to see your options:
    1. New Audio Recording: simply record your voice 
    2. New Video Recording: use your built-in camera to create a video of you talking to your computer
    3. New Screen Recording: record your screen and everything that happens on your screen*


*Note with Screen Recordings: You DO need to make sure that the Microphone is on in Options if you want your voice to record along with the screen. Also, I recommend showing your mouse clicks in the recording.

When you have ended your Quicktime recording, it might be best to compress it before sharing with others (file space and upload speed concerns). Simply click on File > Export As and choose a smaller quality file.

Here is the official, more detailed support article from Apple.

How to scan documents with your iPad or iPhone

Another simple tutorial for a built-in app on your iOS device to help with your Continuous Learning needs.

How to scan documents with the Notes app - Apple how-to document.


Stay Connected via Facetime

While busy connecting with colleagues and students, don't neglect the importance of increasing connections with family and friends during this stressful time.

Simple, but effective, is a Group FaceTime. Learn how here:

Enrichment for Students

While there currently is a barrage of free, creative, online resources available for home-schooling parents and teachers sending out enrichment to their students, here are a few Big Ideas for making the most of Continuous Learning.

Everyone Can Code

What a perfect opportunity to work through Learn to Code in the Swift Playgrounds app on iPad!

#CreatetoCope

Everyone Can Create is the perfect resource for teachers and students alike. Open one of the 'Everyone Can Create' books (Drawing, Photo, Music, or Video), launch a built-in app on your iPad, and get creative. 

Listen and Learn

Visit Apple Podcasts and subscribe to a show or two. Listen a little every day. Discovering Podcasts guide.
Set up the Overdrive app on your phone and call your public library if you are uncertain how to log in. Download an audiobook and maximize your personal enrichment!

Challenge Yourself

Using the Challenge Based Learning framework, explore a Big Idea that matters to you. Whether you call it a passion project, 20% time, or Genius Hour, you can self-direct your learning journey and do something that makes a difference with your independent learning time. 


First time users to Zoom

Faculty meeting through Zoom to prepare for remote learning
Helping teachers connect, collaborate, and support their students through video conferencing tools like Zoom gives me hope for the future of digital, blended and personalized learning in our schools. 

Although the circumstances that have led us to this point are unfortunate to say the least, it is exciting to see so many adapt to digital communication channels like Zoom. 

Some getting started tips and best practices:
  • Zoom.us - get a free account or reach out to Molly at ESU 8 if a Zoom Pro account is warranted. 
  • Teacher Tutorial for Using Zoom for Online Teaching (created by a student!)
  • Zoom Task Cards shared graciously by Jenna Reeh of Papillion LaVista Schools. 
  • UPON ENTRY in a Zoom meeting: Show people how to mute and unmute themselves. As meeting host, you can Manage Participants and Mute All, but allow for others to unmute and show them how to do so, so that future interactivity is seamless. In the Advanced Settings online you can also check a box so that all participants are automatically muted upon entry. Because this is a user-controlled setting and not a default, teach your participants how to do it themselves so they get comfortable using anyone's Zoom rooms. 
  • ZOOM FROM HOME: Because our home internet connectivity isn't as good as at school, consider turning off your video and/or telling participants to do the same. It is far more stable when just sharing audio. However, turn your video on from time to time to add that human connection when at all possible. 
  • RECORDING ZOOM SESSIONS: If you Record a Zoom meeting and you are looking for where that recording went, the default is a folder in your Documents called Zoom. You can control where the Recordings go in your Pro account by going to Zoom.us > Preferences > Recordings. You can also have them saved automatically to the cloud (then you don’t have to upload) and a whole bunch more advanced settings when you go to your Advanced Settings online in your Zoom account. 


Tuesday, January 7, 2020

An Elf's Key(note) to Toy Making


Considering applying to be hired as one of Santa’s elves? Complete a written application and demonstrate your toy making abilities with Keynote!

Learn some Keynote skills along the way. All it takes is your imagination and you can prove to Santa that he should hire you as his next lead Elf!

Download the Keynote file here


Enjoy some elves-in-training from Mrs. Sladek's Writing classes here:


And a sneak peek into the toy-making process of these elves:


Monday, January 6, 2020

ESU 8 App Design Challenge Day

On December 10, 2019, ten teams of middle school students from ESU 8 schools put their minds to work designing app prototypes for community challenges.


We started the day with a kick-off on the power of learning to code. 

Every student accessed an App Design Journal (in Keynote) and began customizing their journal to document their journey. 

We utilized Challenge Based Learning as a framework for our day's learning. An overarching challenge "Use app design to solve a community challenge" was presented.


Then three community experts presented Big Ideas & Community Challenges for the student teams to ponder. 


Teams each decided on which Big Idea/Challenge they would take on and immediately got busy investigating through guiding questions and activities.


One of the coolest things learned was how easy it can be to create an app prototype in Keynote. After watching this app developer share his WWDC presentation, teams quickly started creating app prototype design plans, storyboards, and hyperlinked Keynote slides to showcase the main features of their thinking.


The day was culminated with an App Showcase where teams presented their app prototype in rotations sharing a 3 minute pitch and time for feedback from visitors.  During round 1 half of the teams presented three different times, while the other half of the teams served as feedback givers. Then in round 2 the roles were reversed. ESU 8 professionals joined the app showcase and were impressed by the ideas and quick turnaround on product by the student teams!


Teachers and students alike were anxious to get back to their schools and explore coding and app design with even more learners. 


A snapshot of an exciting day at ESU 8!