Seesaw is advertised as a digital portfolio for students. Although that is a major component of Seesaw, there is so much more to the tool. It brings engagement, collaboration, and innovation into the classroom. This tool is great for connecting families to a student's education as well as a great place to foster motivation and encouragement. Many of ESU 8 teachers are already using the tool in their classrooms and are finding the simplicity of it is what makes it so powerful.
Why use Seesaw in your classroom?
Empowers students to take ownership of their learning.
Encourages students to reflect on their learning over time.
Seesaw inspires students to do their best work by providing an authentic audience.
Encourages parent participation in their student's education.
Now take a few minutes to watch this video on how to start the year off with Seesaw.
Last Spring Apple introduced a brand new app that gives us a fun way to build an expressive story. Available for free for all iOS products (iPhone, iPad, etc.) it is simply called Clips.
Why learn a new tool to create digital stories?
Clips allows you to...
avoid the learning curve that you may encounter with many multimedia creation apps
record, edit, and share all on the go (designed for a purely mobile experience)
add a variety of creative filters, overlays, background music and more... all with open usage rights
engage even the youngest of learners with its natural, intuitive workflow
When you launch the app you will see that Clips is designed for immediate recording. There are 3 sources for capturing: video, photos, or pull in anything from your camera roll/Photos Library.
*A big difference from what some of us more traditional video creators might be used to is that you have to hold the red record button for the entire duration of what you want to capture. (For example if you are bringing in a prerecorded video or photo, you have to hold the record button the entire time the video is playing, or you will only add that much to your Clips project.
* TIP:Press and slide to the left on the red record button to lock it in recording mode. This frees up your fingers to interact with your photo or video... for example, pinch to zoom and move it around in the square frame.
The 4 cool buttons at the top allow you to do the following:
1) Live Titles (Your speech will be typed on screen in time with you saying it (like closed captioning)
2) Filters (add fun effects to any part(s) of your video
3) Overlays (Select from pre-made 'stickers', pinch, zoom, rotate, edit text)
4) Posters (Full screen backgrounds with editable text and a bit of included animation)
*The ability to take one photo, zoom in, point and label, zoom out, and create simple, smooth pans truly elevates the media created with Clips above that of a traditional slide show.
Clips always adds new content to the end of your project, but you can easily tap, hold, and drag to move its position anywhere in your 'timeline' across the bottom. Additional editing can include editing the text from your transcribed live titles, muting audio, trimming the ends of each clip, and deleting clips.
One of the most powerful features of Clips when using it the classroom is the background music option. By clicking the music note button in the upper right of Clips, you have access to numerous soundtracks of royalty-free music. Each adjusts to match the timing of your project and even automatically fades in and out depending on pre-existing audio!
Sharing options are numerous and simple. In addition to a variety of social media outlets, each Clips projects can be saved to the camera roll for additional remixing, app smashing, and sharing.
Now, watch a Clips video about a simple project using Clips with kids!
View so many more inspiring ideas by searching the hashtag #ClassroomClips on social media sites such as Twitter, Instagram, and Facebook.
Let's take a closer look at what sets Apple's iWork apps apart from other app suites by exploring a few skills and accompanying projects possible in Keynote.
Use Shapes Library & Drawing Tools --- to create --- Infographics
Use Magic Move --- to create --- Animated Learning
Use Links and invisible buttons --- to create --- Quiz Shows
Don't hesitate to begin with the free Starter Guides from Apple Teacher:
Nebraska educators have been implementing and reaping the benefits of blended learning for quite some time. ESU 8 teachers are no different. One of our most respected experts in the field is Catlin Tucker, blended learning practitioner, guru, and published author. Her book titles, especially Blended Learning in Grades 4-12, have paved the way for many classrooms to begin blending and adapting the techniques for their own needs.
Even more valuable, however, is Catlin's experience as a practicing teacher in California. For the approximately 50 professionals who gathered together at the Lifelong Learning Center on June 9, her classroom examples and advice from the trenches were spot-on and tremendously helpful.
The crux of the day was spent experiencing blended learning's most well-known model: station rotation. We not only experience Catlin's station-rotation experience (all centered around dynamic student discussions) but also learned many implementation tips.
Catlin shared an expert look into the flipped classroom model of blended learning and ways to adapt it to leverage even more student engagement and success.
Another highlight of the day was playing a classroom vocabulary game Catlin created with her students, modeled after 'Word Sneak' from the Tonight Show.
All in all, the day was a successful blending of pedagogy and practices, interaction and inspiration. Nebraska educators who attended were excited to work on implementation goals for the upcoming school year... even this early in summer vacation!
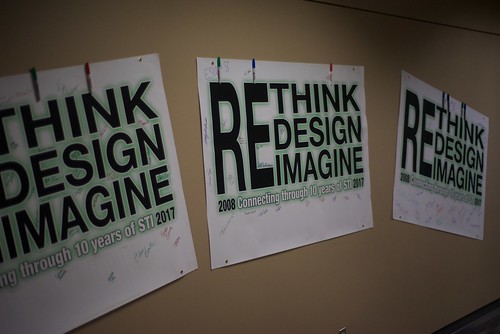
For the past decade you have been joining us just days after the conclusion of your school year to get your geek on with other Northeast Nebraska educators passionate about EdTech. And if you haven't, you are missing out! Highlights of this year's STI held May 31-June 1 at the Lifelong Learning Center in Norfolk included Matt Miller's keynote message and breakout sessions. Matt shares many of his resources at getmattsstuff.com.
Members of the NNNC STI Planning Team with 2017 Keynoter Matt Miller on day 1 of the event.
In addition, numerous regional practitioners gave of their time to share their educational technology talents with the approximately 300 participants.
You can continue to access the event's Sched site as many presenters have shared links and resources associated with their presentations, accessible even after the conference's conclusion: View the NNNC Summer Technology Institute schedule & directory.
View photo highlights from the two day event here:
Don't miss next year's event, currently scheduled for one day (Wednesday, May 30, 2018). The NNNC planning committee was excited to announce that Leslie Fisher is our confirmed keynoter.